Using NABS Confidence
Running a retro
The Retro Dashboard is one place per retro that shows where it is and what to do next. Click a retro in the Retros view, or run NABS Confidence: Open Retro Dashboard.
The dashboard sits beside the other panels. The Retro panel, the Objective Assessment panel and the Archive panel all stay, and the dashboard links to them.
The six stages
A stepper across the top reads 1 Prepare · 2 Gather · 3 Insights · 4 Objectives · 5 Decide · 6 Close & share, with the maturity curve under it. Click a stage to look at it. A done stage is ticked. An exclamation mark means it was left with open items. The stage is saved in the retro (stage, stageChangedAt, stageChangedBy), so the team sees it after a pull.
What to do next is one primary action for the stage you are looking at. Ready to move on? is a checklist: a tick is done, an exclamation mark is worth a look, a circle is still to do. These are suggestions. About this stage says what the stage is for and a rough time.
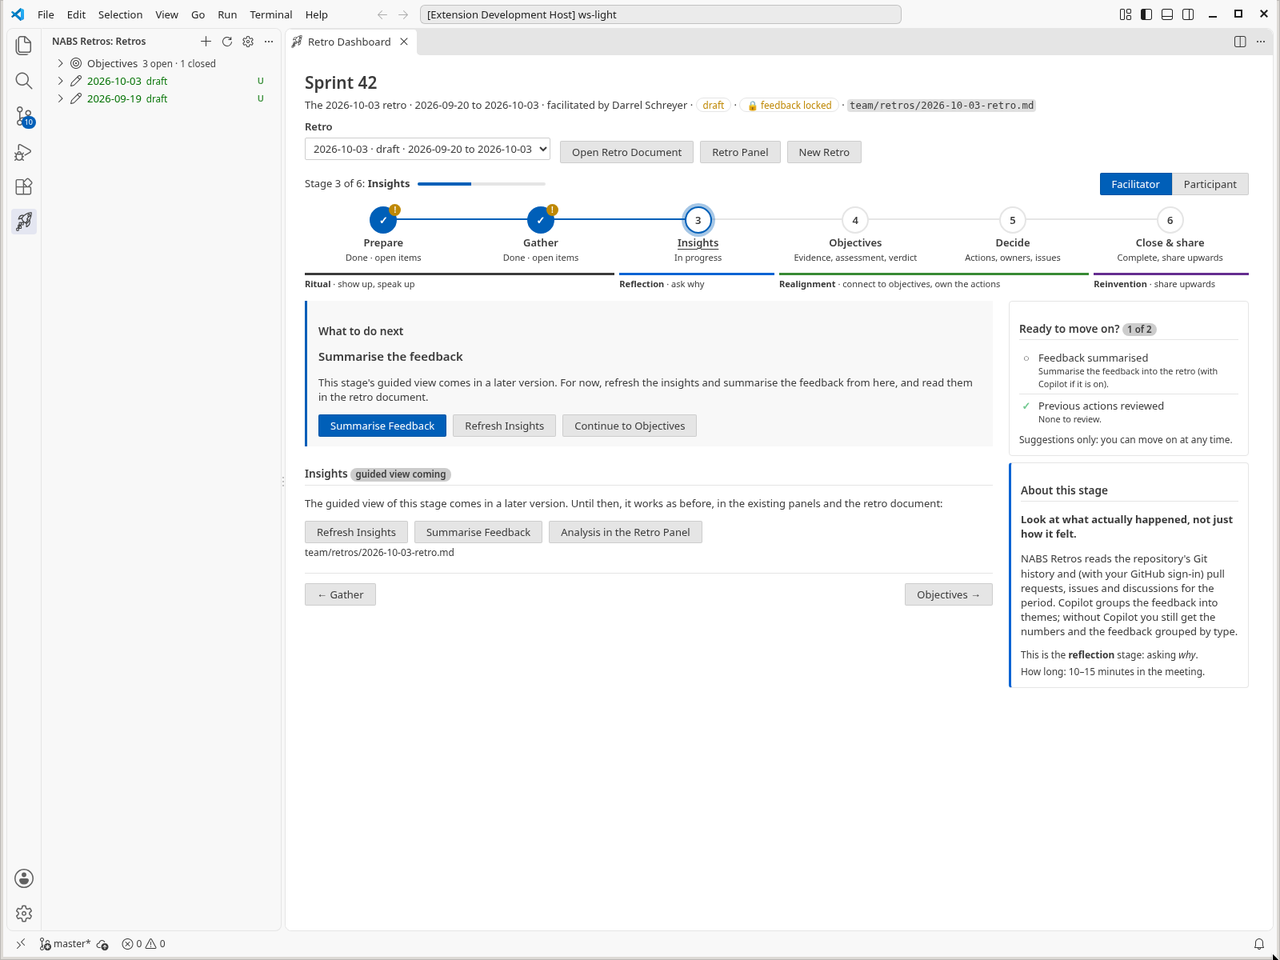
Only Prepare and Gather have a guided view in this version. Insights, Objectives, Decide, and Close & share show a guided view coming badge. You can still do the work. The stage links to the panels and the retro document. Do not expect a step-by-step screen for those four.
Prepare
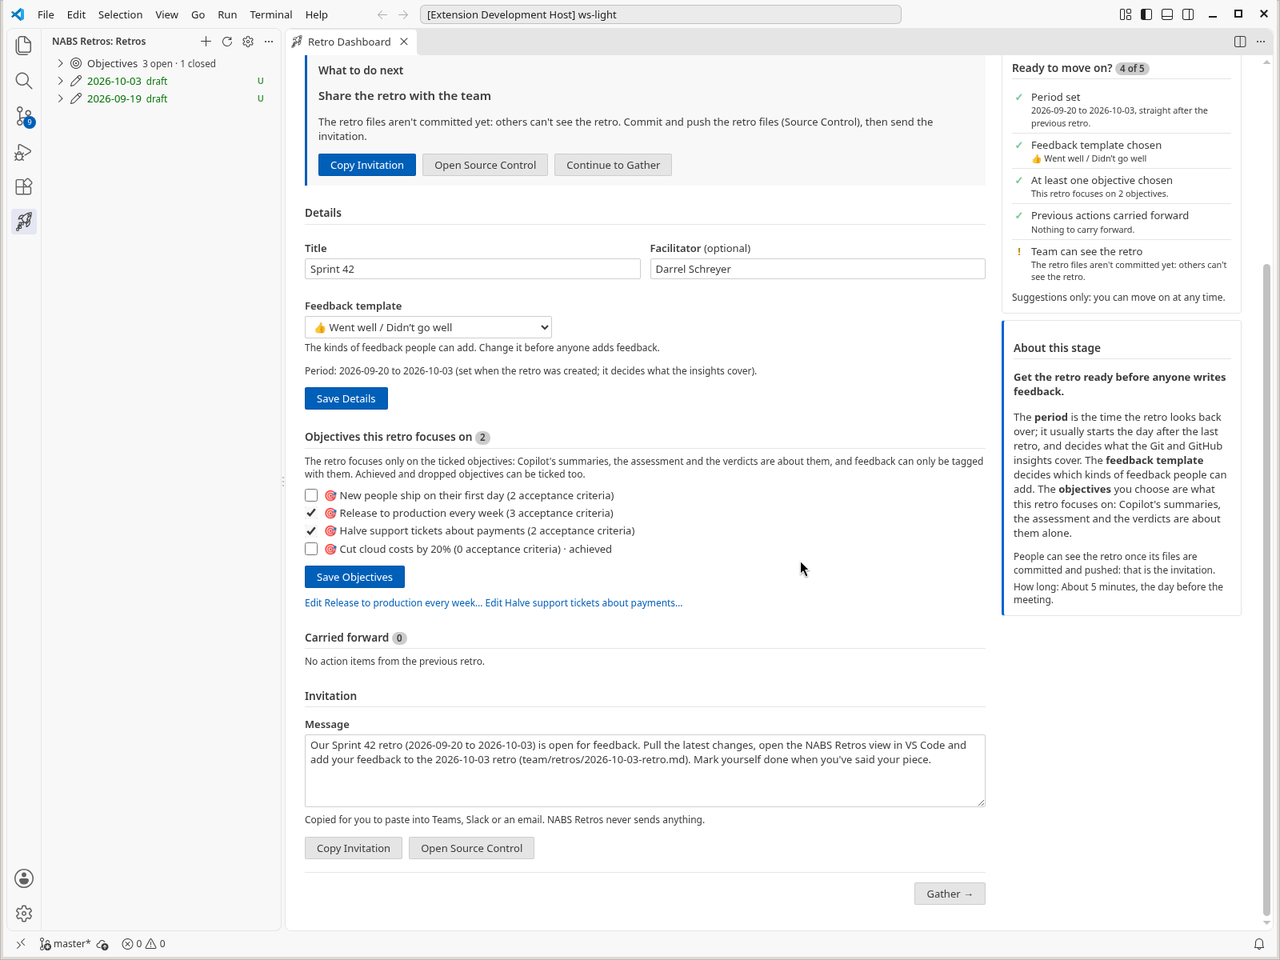
Prepare is for the day before the meeting. You can set the title, the facilitator and the feedback template, and save them. You tick the objectives this retro focuses on and click Save Objectives. Previous action items are listed. An invitation can be edited and copied. NABS Confidence never sends it.
The checklist includes Team can see the retro: are the files committed and pushed? The check is read-only. Open Source Control is there so you can commit and push yourself.
Gather
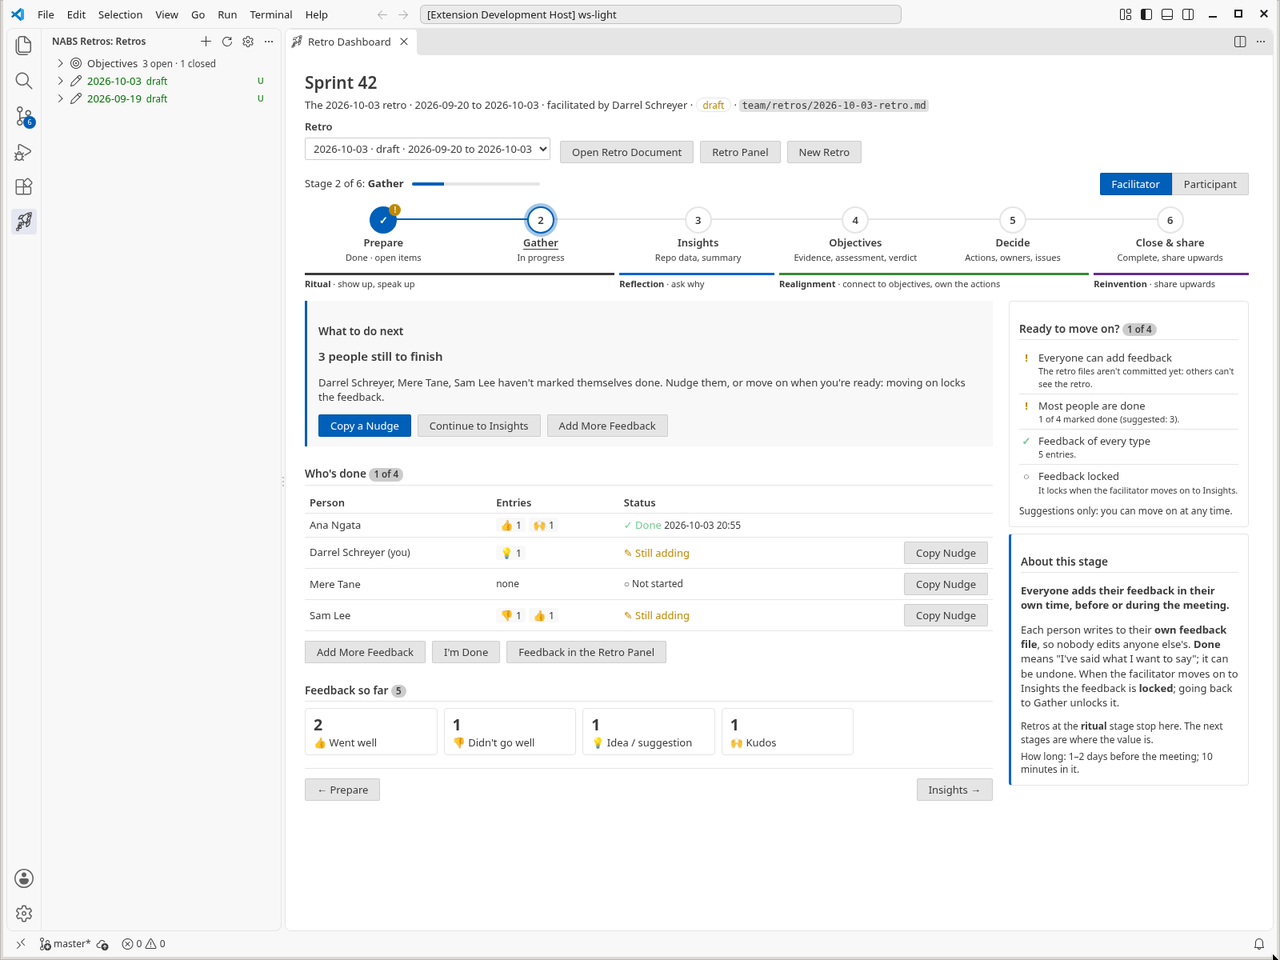
Gather is where feedback comes in. The facilitator sees who is done, counts by type, and can copy a nudge for one person or for everyone still adding. A participant sees their own entries, and how many people are done, not anyone else’s words. The meeting is where the team talks those through.
The full steps for writing feedback are on Feedback and Gather.
Moving on, and the feedback lock
Move the retro on (Continue to …, or Move the Retro On / Back at the bottom) is for the facilitator. The default mode is Facilitator when you are the retro’s facilitator, or when the retro has no facilitator yet. Otherwise you start as Participant. The switch is remembered for the session only.
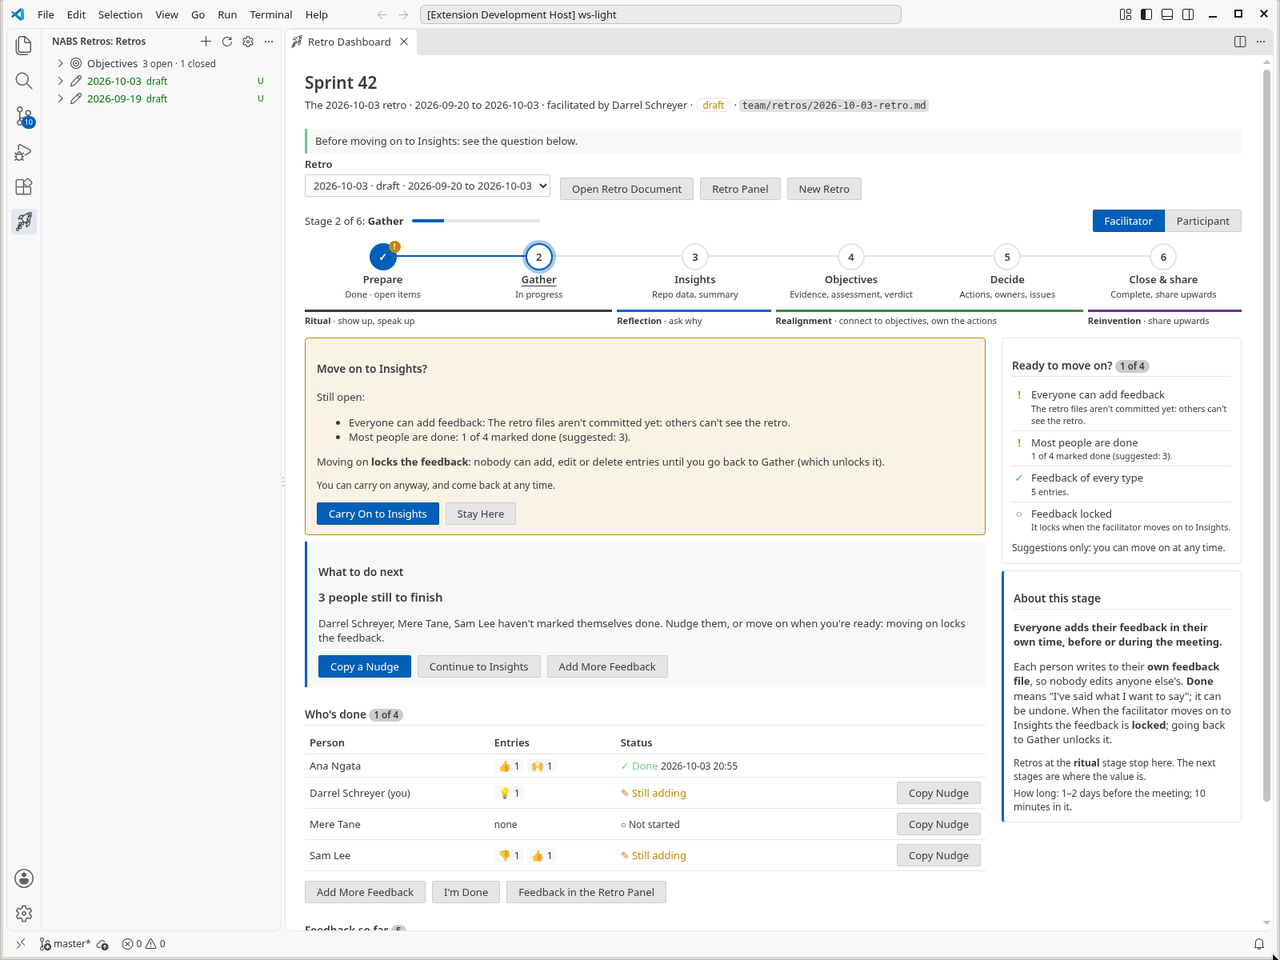
Moving forward with open checklist items, or past Gather, asks first in the panel: Carry On or Stay Here. Going back never asks. Moving past Gather locks feedback (feedback: locked). Going back to Gather, or to Prepare, unlocks it. The lock is enforced by the extension’s forms. A hand edit of the feedback file is not blocked, and a teammate on an older version of the extension can still add feedback.
Insights, Objectives, Decide, Close & share
These four stages are real, and the checklist and “what to do next” are real. The guided layout is not.
- Insights is reflection: refresh the insights, summarise the feedback, and read them in the retro document. Without Copilot you still get the numbers and the feedback grouped by type.
- Objectives opens the Objective Assessment panel: evidence, Copilot’s assessment when you have run it, and the team’s verdict.
- Decide is where actions are agreed. Write them in the retro, then create GitHub issues from the Retro panel. See Action items.
- Close & share is where you mark the retro complete in the Retro panel’s Details, write Insights to share upwards in the document, and, when you are finished, archive it to a Discussion.